How to Provision AWS EC2 in Private Subnet by Using SSM and Ansible Dynamic Inventory
An example to provision EC2 instances in the private subnet using AWS SSM, Ansible Dynamic Inventory and AWS community collections.
Overview
For the starter, I admit this is probably not the best thing to provision EC2 in AWS. I wrote this article only to share our experiences on migrating on-premise VMs based deployment into the cloud environments. As a baby step, we began to use EC2 as our VMs replacement to deploy our services. That was our sole focus. We avoided dramatic changes in our day to day activity. Therefore we kept our development practice such as server configurations, pipelines, repositories, and others, as ordinary, to make the transition smoother and faster. For server configurations, maybe we can swiftly transition to configure instances by using user data. Nevertheless, when it comes to the deployment pipeline where we need to copy our build artifact to the servers and restart the systemd, it is not as simple as user-data or image builder.
Decomposing services using ECS, EKS, Fargate, Lambda, etc were too far for us at that time because our tasks were not only migrating, but we had some features as well.

Ansible and EC2
Since we use Ansible for more than four years, we already have playbooks as our infrastructure as a code. That’s including our server configurations and pipelines. Therefore we need to find a way how to make Ansible works in EC2. It is maybe not a big deal if you put your EC2 instances in the public subnet. You can use an SSH connection and then starting to provision using Ansible. But when your instances are in the private subnet, and the only access is Amazon EC2 System Manager (SSM), you will start to find some challenges. At the very least, that was my experience.
Prepare Your Ansible
Because we need collections from ansible-galaxy, it is better to use the latest Python and Ansible version. FYI, I am using Python 3.9, Ansible 2.10.4, aws community collections 1.3.0 and OSX 10.14.6 (Mojave).
| # ansible --version | |
| ansible 2.10.4 | |
| config file = None | |
| configured module search path = ['/Users/ru-rocker/.ansible/plugins/modules', '/usr/share/ansible/plugins/modules'] | |
| ansible python module location = /usr/local/Cellar/ansible/2.10.4/libexec/lib/python3.9/site-packages/ansible | |
| executable location = /usr/local/bin/ansible | |
| python version = 3.9.1 (default, Dec 29 2020, 07:31:08) [Clang 11.0.0 (clang-1100.0.33.17)] |
When I am using Python 3.7 and Ansible 2.9.X, I got an error several times about a worker was found in a dead state. The workaround is to set an environment variable:
export OBJC_DISABLE_INITIALIZE_FORK_SAFETY=YES
But after upgrade to the latest version, I found no error anymore.
Ansible AWS Collections
After we setup our Ansible, now we will install community collections AWS using ansible-galaxy.
ansible-galaxy collection install community.aws
We will do some modifications based on these collections later. But for now, let focus on preparing our environments.
Boto3
Because the collections are heavily depended with boto3 libraries, we will install those libraries too.
pip install boto3
pip install botocore
AWS
community.aws collections have many modules. But because we want to provision EC2, so our focus would be the SSM module. These collections need S3 as a temporary Ansible file storage then transferred to EC2 by using curl. So in the AWS part, we need to set up three things. They are IAM user, S3, and EC2 instances.
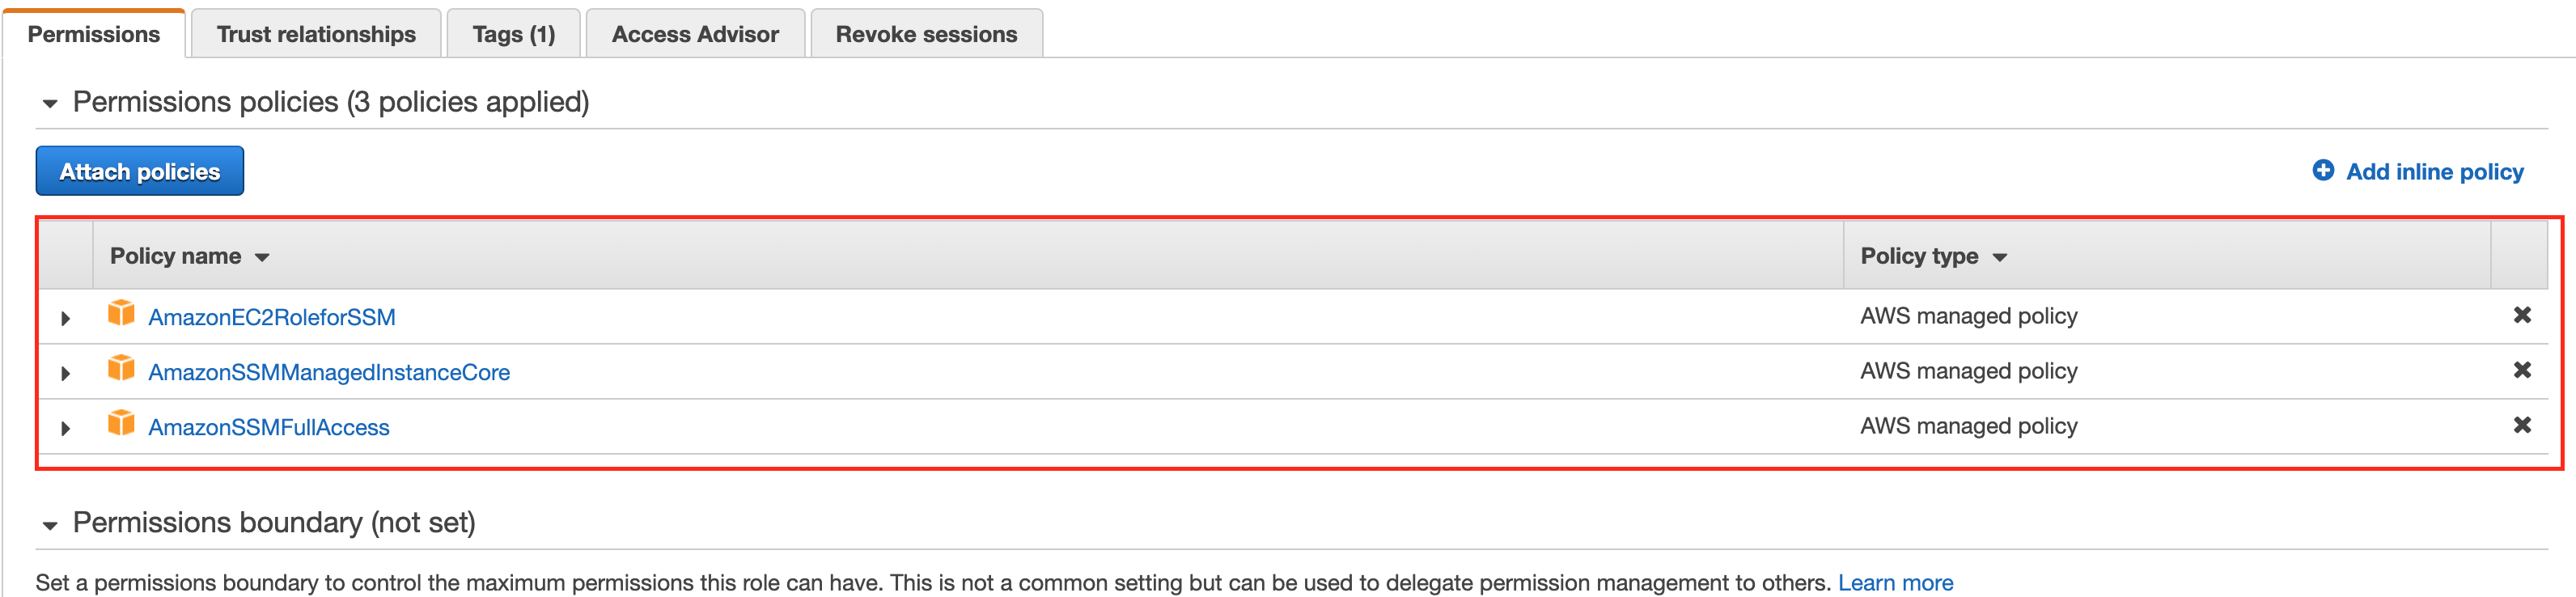
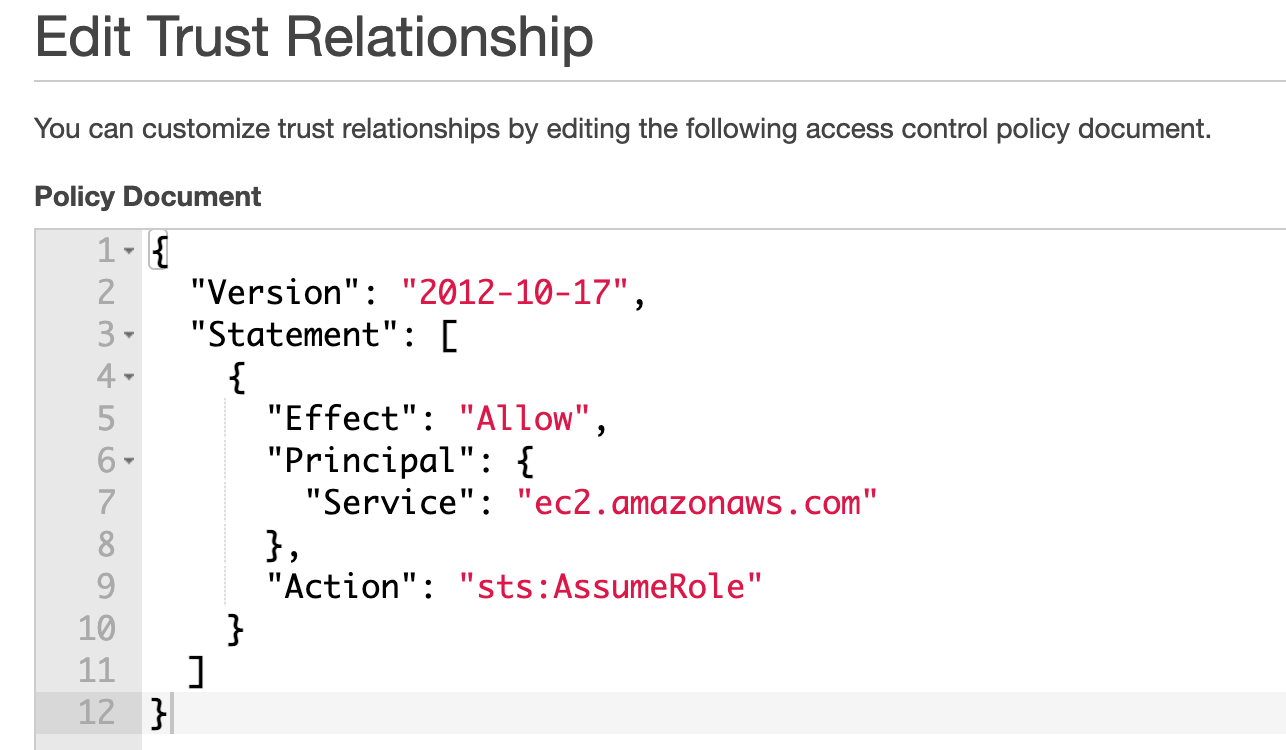
IAM Role: SSM
First, we need to initiate SSM role, set names, built-in policy, and trust relationships.
IAM Users
We need to create an IAM users with SSM, S3 and EC2 policies.
| { | |
| "Version": "2012-10-17", | |
| "Statement": [ | |
| { | |
| "Sid": "VisualEditor0", | |
| "Effect": "Allow", | |
| "Action": [ | |
| "ec2:DescribeClassicLinkInstances", | |
| "ec2:DescribeInstances", | |
| "ec2:StopInstances", | |
| "ec2:DescribeSecurityGroups", | |
| "ec2:StartInstances", | |
| "s3:DeleteObjectVersion", | |
| "s3:GetBucketVersioning", | |
| "s3:PutObject", | |
| "s3:GetObject", | |
| "s3:DeleteObject", | |
| "ssm:GetCommandInvocation", | |
| "ssm:StartSession", | |
| "ssm:SendCommand", | |
| "ssm:GetConnectionStatus", | |
| "ssm:ResumeSession", | |
| "ssm:ListCommands", | |
| "ssm:DescribeSessions", | |
| "ssm:TerminateSession", | |
| "ssm:DescribeInstanceInformation", | |
| "ssm:ListDocuments", | |
| "ssm:ListCommandInvocations", | |
| "ssm:DescribeInstanceProperties" | |
| ], | |
| "Resource": "*" | |
| } | |
| ] | |
| } |
After created the user, do not forget to get aws_access_key_id and aws_secret_access_key.
S3
Next we will create S3 bucket. For this article, I created an S3 bucket with name test-ansible-ec2-ssm. Then we need to setup the S3 ACL in order to allow our playbook to access the bucket.

EC2
For EC2, we will use Amazon Linux 2 and instance type t2.micro. Because this is only a demo, I picked a free tier. But you can choose any instance based on your need. Next, you need to select the VPC and put the SSM role for the instance. The rest configurations are up to you. But do not forget to put tags to your instances. These tags are needed as a filter for our Ansible dynamic inventory. You will see later in this article about dynamic inventory. For now, just put a tag with a key-value pair KEY: ru-rocker.

Playbook
As stated previously, for the playbook, we will use the Ansible AWS community collections. But I need a slight modification inside aws_ssm.py because there were some minor issues. Because the collections read the AWS_ACCESS_KEY_ID, AWS_SECRET_ACCESS_KEY, and AWS_SESSION_TOKEN simultaneously, it could cause an issue if I do not provide each one of them. Because in this case, we did not need AWS_SESSION_TOKEN. Of course, you can set the credentials into your profile by using AWS configure. But since we want to look at another option, we tried to pass the keys into the playbook.
In this article, I put the modification under connections_plugins directory inside the playbook.
| # connection_plugins/aws_ssm.py | |
| # code fragment | |
| def _get_boto_client(self, service, region_name=None): | |
| ''' Gets a boto3 client based on the STS token ''' | |
| aws_access_key_id = self.get_option('access_key_id') | |
| aws_secret_access_key = self.get_option('secret_access_key') | |
| aws_session_token = self.get_option('session_token') | |
| if aws_access_key_id is None: | |
| aws_access_key_id = os.environ.get("AWS_ACCESS_KEY_ID", None) | |
| if aws_secret_access_key is None: | |
| aws_secret_access_key = os.environ.get("AWS_SECRET_ACCESS_KEY", None) | |
| if aws_session_token is None: | |
| aws_session_token = os.environ.get("AWS_SESSION_TOKEN", None) | |
| client = boto3.client( | |
| service, | |
| aws_access_key_id=aws_access_key_id, | |
| aws_secret_access_key=aws_secret_access_key, | |
| aws_session_token=aws_session_token, | |
| region_name=region_name) | |
| return client |
I already reported this case in this link.
Dynamic Inventory
Because EC2 instance names are hard to remember, and their ephemeral nature, it is a big risk to pick instances names as our inventory. Therefore, we need to use AWS dynamic inventory to retrieve instances name. The inventory file name suffix should be *_aws_ec2.yml. So you can have multiple inventories for DEV, SIT, UAT with the name dev_aws_ec2.yml, sit_aws_ec2.yml, etc.
The major drawback for AWS dynamic inventory, we need to set the profile (or use default). We cannot pass the security token via ansible extra variables. For this case, let’s create another IAM user with EC2 policies only.
I won’t explain how to create an IAM user for this dynamic inventory needs. Just follow the previous one, but only take the EC2 instances policies.
After we retrieve aws_access_key_id and aws_secret_access_key, we need to configure another profile. We will name it ansible-dyanamic-inventory profile and we will use it in the inventory file.
| vim ~/.aws/config | |
| [ansible-dynamic-inventory] | |
| region = ap-southeast-1 | |
| vim ~/.aws/credentials | |
| [ansible-dynamic-inventory] | |
| aws_access_key_id = XXXXXXXX | |
| aws_secret_access_key = YYYYYYYYYYYYYYYY |
After we prepare all of the pre-requisites, now it is time to create an inventory file.
| plugin: aws_ec2 | |
| aws_profile: ansible-dynamic-inventory | |
| strict: False | |
| # Populate inventory with instances in these regions | |
| regions: | |
| - ap-southeast-1 | |
| hostnames: | |
| - instance-id | |
| filters: | |
| # get all running instances with tag KEY: ru-rocker | |
| instance-state-name: running | |
| tag:KEY: ru-rocker | |
| # if you need more than one tag filters | |
| # tag:SUBKEY: POC | |
| # tag:ENV: DEV |
Please take a look in the filters area. I put filter tag:KEY: ru-rocker in order to retrieve selected EC2 instances which I will provision with the playbook.
site.yml
To enable the playbook to use AWS community collections, we need to set the variable ansible_connection to aws_ssm. Next, we need to define other variables, such as ansible_aws_ssm_access_key_id and ansible_aws_ssm_secret_access_key, if you do not use AWS profile. Of course, you need to set ansible_aws_ssm_bucket_name to tell the playbook in which S3 location that the playbook will store its temporary file.
| - hosts: all | |
| roles: | |
| - lorem | |
| become: true | |
| gather_facts: no | |
| vars: | |
| ansible_connection: aws_ssm | |
| ansible_aws_ssm_region: ap-southeast-1 | |
| ansible_aws_ssm_access_key_id: "{{ access_key_id }}" | |
| ansible_aws_ssm_secret_access_key: "{{ aws_secret_access_key }}" | |
| ansible_aws_ssm_bucket_name: test-ansible-ec2-ssm |
roles
For the roles, there is nothing different from the on-premise approach. We almost can use everything available in the ansible.builtin modules.
I said almost everything because I never test all the built in modules.
In this article, I will copy a file using ansible.builtin.template module. The template itself only a lorem ipsum text, and I will copy it into /tmp/ directory in target server.
| # lorem/tasks/main.yml | |
| - name: copy lorem file | |
| template: | |
| src: lorem.txt.j2 | |
| dest: '/tmp/lorem.txt' | |
| mode: 0644 | |
| # lorem/templates/lorem.txt.j2 | |
| {{ lorem }} | |
| # lorem/defaults/main.yml | |
| lorem: Lorem ipsum dolor sit amet, consectetur adipiscing elit, sed do eiusmod tempor incididunt ut labore et dolore magna aliqua. Ut enim ad minim veniam, quis nostrud exercitation ullamco laboris nisi ut aliquip ex ea commodo consequat. Duis aute irure dolor in reprehenderit in voluptate velit esse cillum dolore eu fugiat nulla pariatur. Excepteur sint occaecat cupidatat non proident, sunt in culpa qui officia deserunt mollit anim id est laborum. |
Output
After we completed the playbook, it is time to test it and see the results.

And in the EC2 target server.

Know Issue
When I tried using ubuntu image, I found an issue when executing the playbook:
ssm_retry: attempt: 0, caught exception(invalid literal for int() with base 10: "echo $'\\n'$?"
It seems there is an issue regarding bash and sh. The AWS community collection only works in bash environment. There is a workaround for this case, just refer to this link.
Conclusion
As I stated at the beginning, this is maybe not the best approach to provision the EC2 instances. But this approach works in our current environment to keep the development pace while we started to migrate to the cloud. Therefore we could keep the minimum effort to migrate and getting use ourselves to the cloud environment. And we can keep maintaining our deliverables while having the benefit of the cloud’s resiliency and elasticity.
That’s all for today. You can see the playbook on my github repository at https://github.com/ru-rocker/ansible-aws-ec2-ssm-example.
References
- https://docs.ansible.com/ansible/latest/collections/amazon/aws/aws_ec2_inventory.html
- https://github.com/ansible-collections/community.aws